ShareX is a free and open source screenshot and file sharing tool. Ever since I’ve discovered it back in 2019, I’ve been using it daily as my favorite tool to capture screenshots, short videos, gifs, create short links, pick colors, upload files, and more. It’s extremally powerful. Today we’re going to set-up ShareX to upload our screenshots and other files to our Scaleway elements object storage bucket and generate a link for easy sharing.
To get started, we’re going to need to install ShareX. Unfortunately it’s currently only available on Windows, so if you’re using MacOS or Linux, you’re out of luck. You can download the latest version of ShareX from the official website - https://getsharex.com, where you can also find a link to the source code hosted on GitHub.
After ShareX is installed, we’re gonna need a Scaleway account. I’m using Scaleway here since for me it’s the most affordable option for me. A great alternative to Scaleway Object Storage is Backblaze B2, which I used to use before.
Go to https://console.scaleway.com/register and create an account. Make sure to add your billing information, otherwise you won’t be able to create a bucket.
After that we’ll select the Object Storage tab in the Scaleway Elements Console:
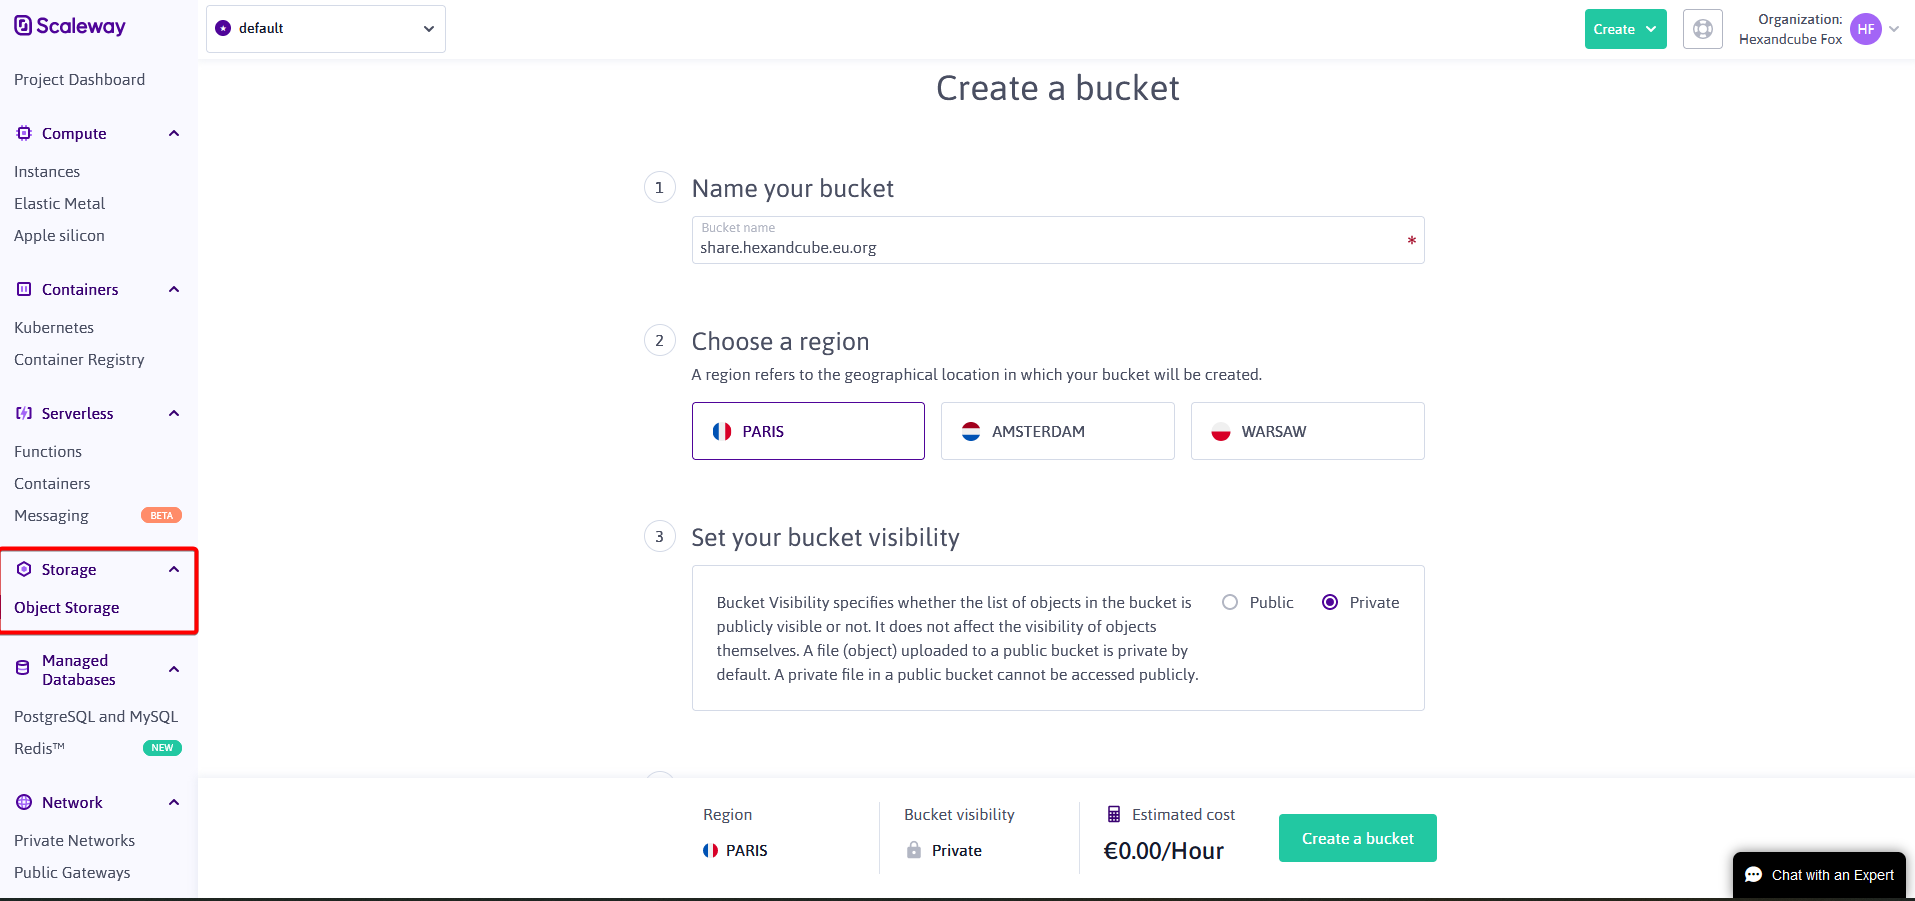
Since we don’t have any buckets yet, we’ll be asked to create one. You can name your bucket whatever you want, but if you want to use your own domain for file sharing, make sure to use it as the bucket name. In this case it’s share.hexandcube.eu.org.
Next we need to choose a region, I recommend selecting the one closest to you. At the moment all Scaleway datacenters are located in Europe. I live in Poland, so I’ll select Warsaw. In the next step, make sure you set your bucket to Private. Otherwise everyone will be able to see the list of all the files in the bucket.
At the end we’ll see a cost calculator. The first 75GB on Scaleway object storage are free, so if you don’t exceed this limit, you don’t have to worry about it.
Now that our bucket is ready, we can go back to ShareX. Go to the Destinations menu, and select Destination settings. From the list of File uploaders, select Amazon S3. We’re going to start with our credentials. Go to https://console.scaleway.com/project/credentials, and generate a new API key. Paste the Access Key in the Access Key ID field, and the Secret Key in the Secret access key field.
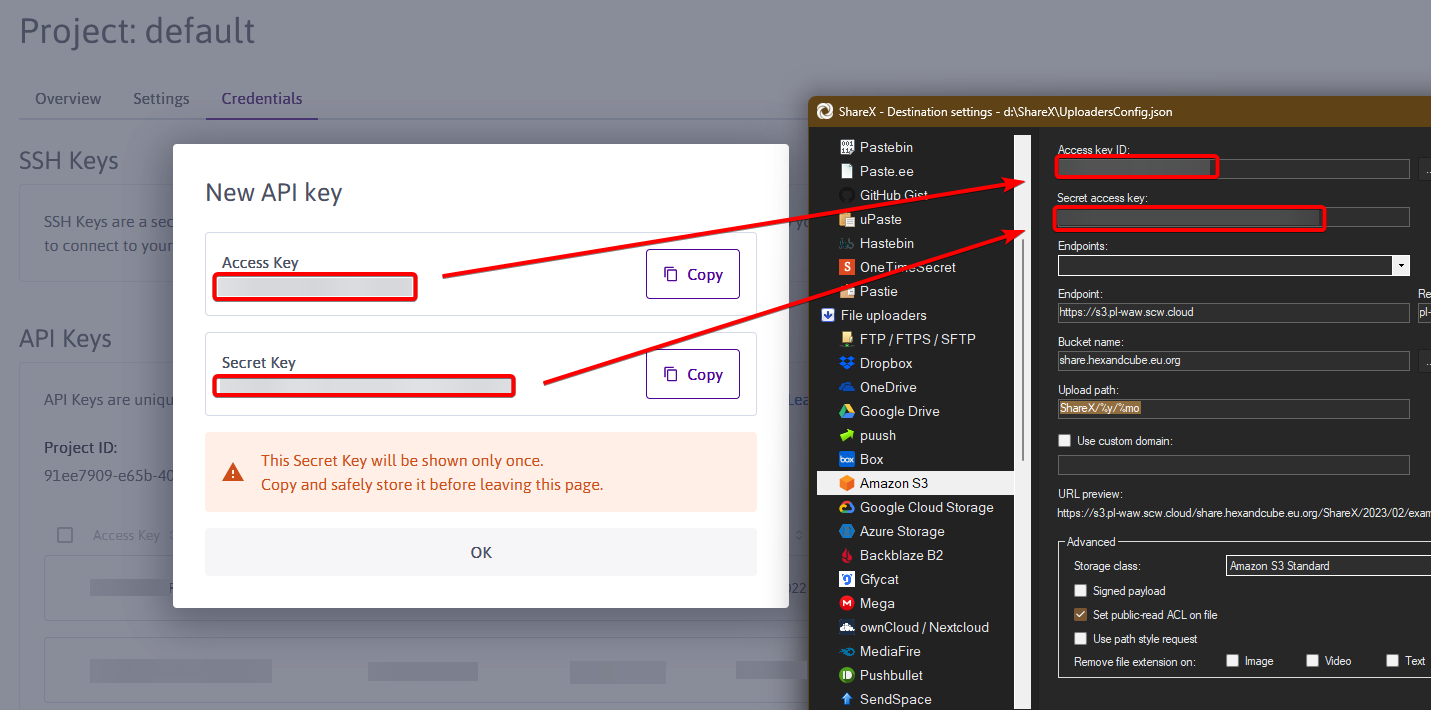
Now we need to go back to our bucket settings. There you can find a URL labeled Bucket Endpoint, which has the format:
https://bucket-name.s3.region.scw.cloud
If the Bucket Endpoint in Scaleway is: https://share.hexandcube.eu.org.s3.pl-waw.scw.cloud, in ShareX we need to input
the following:
Endpoint: https://s3.pl-waw.scw.cloud (Format: https://s3.region.scw.cloud)
Region: pl-waw
Bucket name: share.hexandcube.eu.org
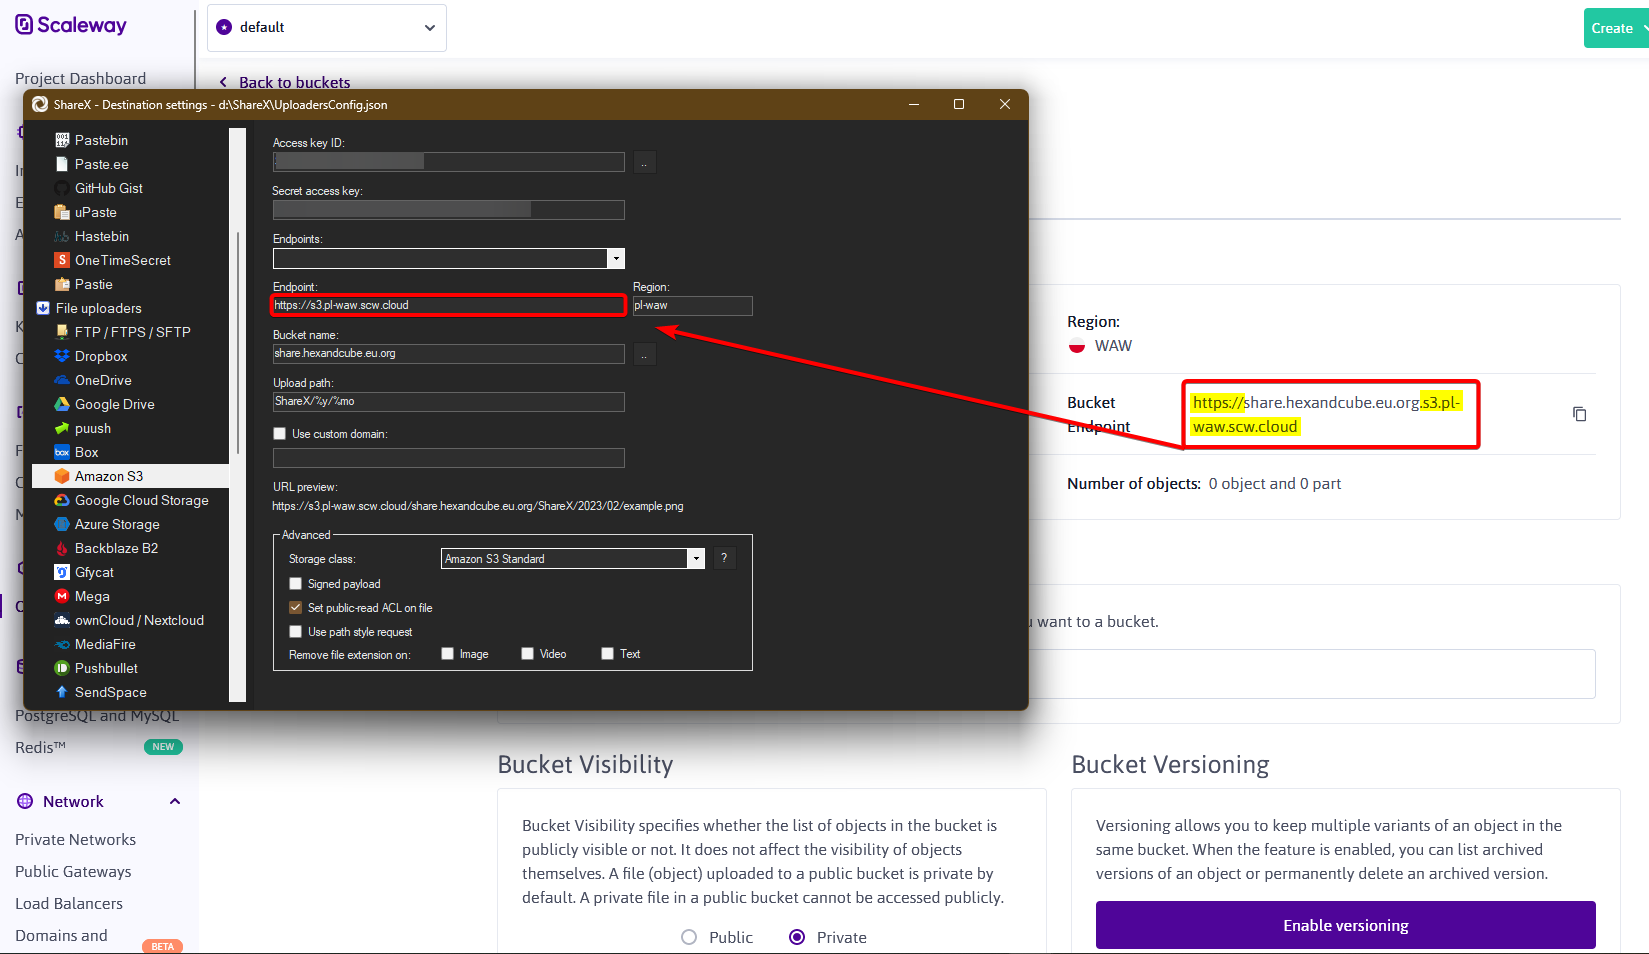
The upload path specifies where the files we upload through ShareX will be located. For example: If I use the path
ShareX/%y/%mo, my file will be uploaded to ShareX/CurrentYear/CurrentMonth/filename.png in my Scaleway bucket. We can
see the URL preview below. Now at the bottom of the settings page, make sure that the Storage class is set to Amazon S3
Standard, and that Set public read ACL on file is checked. This will make our files we upload through ShareX accessible
without authentication, so we can easily share it with others.
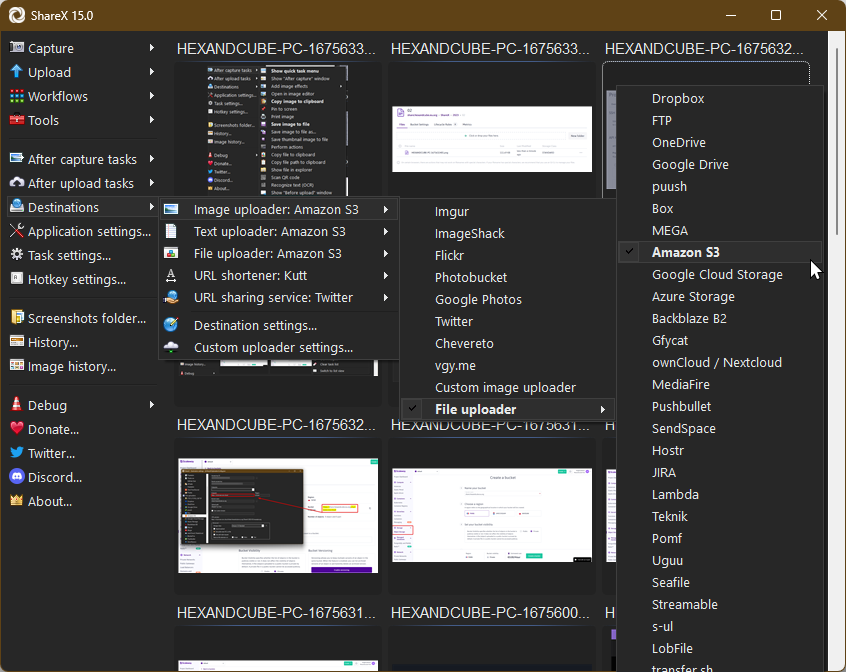
Now close the Destination settings window, and from the Destinations menu select Image Uploader > File Uploader > Amazon S3.
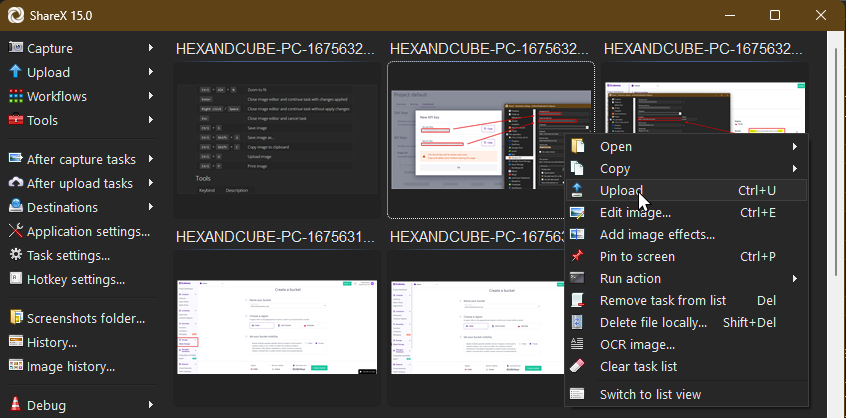
And that’s it. You can now take a screenshot using ShareX (CTRL + PrntScr is the default keybind). Then in theShareX app, right click on the screenshot and click Upload.
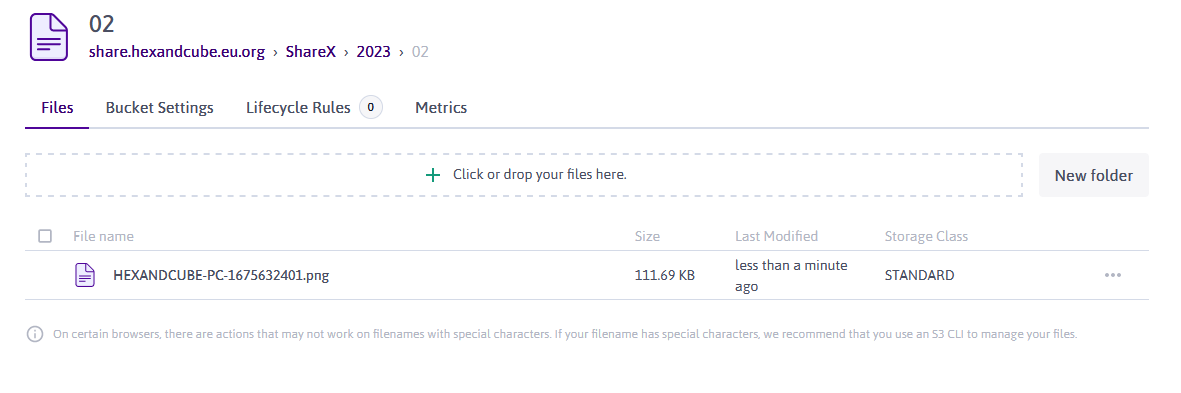
Now, when check our Scaleway bucket, our screenshot is there.
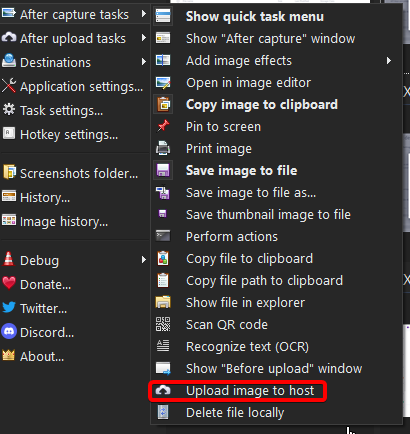
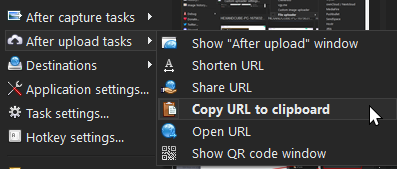
If you want to automatically upload every screenshot taken with ShareX, and get a URL of that screenshot copied to your clipboard, from the After capture tasks menu, select Upload image to host, and from the After upload tasks, select Copy URL to clipboard.
Now when we take a screenshot with ShareX, the screenshot will be automatically uploaded to our Scaleway Bucket, and the URL to the image will appear in our clipboard, ready to share.
If you want to decide what to do after you take each screenshot, in the After capture tasks deselect everything, and select Show “After capture” window. ShareX is very customizable, so you can also edit the options in the After capture window. You can find more informaction about all the features of ShareX on https://getsharex.com/.
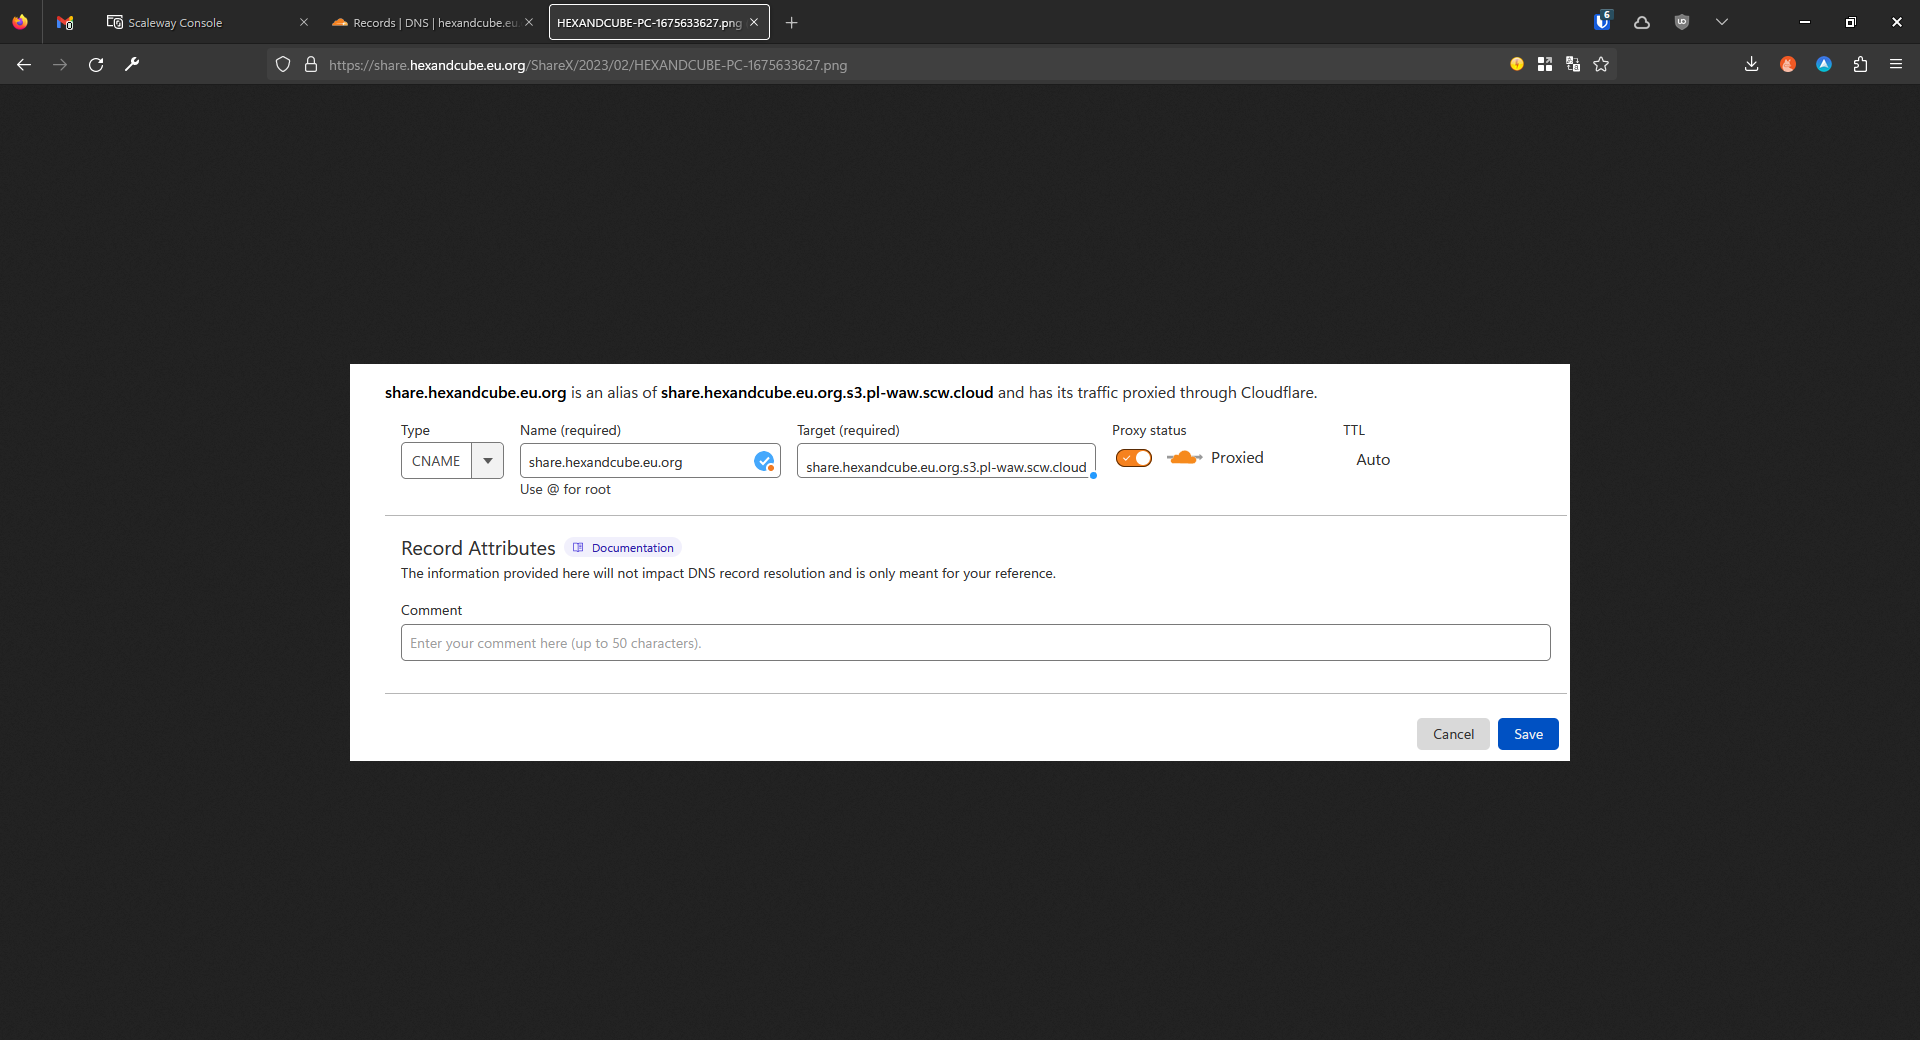
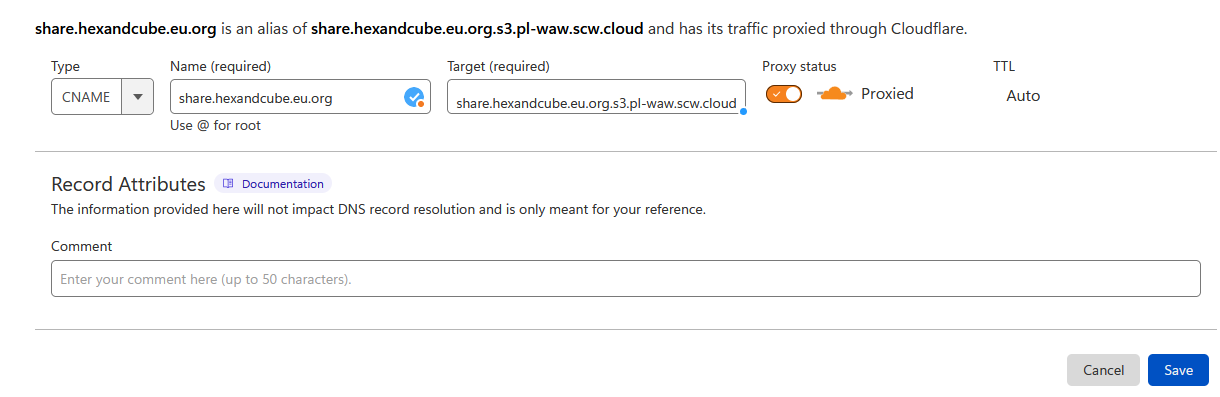
Now if we want to use a custom domain, we have go to our domain’s DNS records. Let’s create a new CNAME record.
The Name will be our domain/subdomain (in this case share.hexandcube.eu.org), and the Target is our Bucket Endpoint
from the Bucket settings in Scaleway console, just without https:// (So here it’s share.hexandcube.eu.org.s3.pl-waw.scw.cloud).
Remember that for this to work, our bucket needs to have the same name as the domain we want to use. I’m using a domain
share.hexandcube.eu.org, so my bucket name is also share.hexandcube.eu.org.
Now go back to our Amazon S3 Destination settings in ShareX, and tick the Use custom domain option, and in the field
below, enter your domain.

Now when we upload the screenshot again, ShareX will automatically generate a nice, clean URL for our custom domain.